In this lesson, you will learn:
- How to use the Dental Segmentation tool in D3Lab x64
- When and why to use the Dental Segmentation tool
Preface
Sections
Demonstration Videos
General CAD Definitions:
- Topographical Segmentation – Segmentation of generic 3D models based off of topographical information like angles and surface area.
- Volumetric Segmentation – Segmentation of medical volumes that typically are obtained with CT scans. Volumetric Segmentation is outside the scope of this application, and alternative software is necessary.
- Face Group – Meshmixer allows you to assign a tag to any triangle in the mesh. These tags are represented by colors in the application. A set of triangles with the same color tag is called a face group.
Tool Parameters:
- Total Number of Teeth – The total number of teeth that exist on the model you are wanting to segment. Ideally the segmentation tool will produce this number of total segments, plus one. The “plus one” is the remainder of the model, typically the gum tissue and base of the model. The tool may make decisions to include or exclude segments based on the user defined parameters, which may result in the final segmentation having +/- the original “Total Number of Teeth” value in actual total segments.
- Berkeley JointSeg* – This is the algorithm used by D3Lab x64 to do the segmentation. The algorithm was written by Matthew Matl, and can be found here (the Apache 2.0 open source license is included with D3Lab x64, but is also available here). It is the only option for now, but there are several other approaches which will hopefully be implemented and listed here in the future.
*[The links provided were checked and working as of 5/2/2020] - Refine Value – An internal parameter within the Berkeley JointSeg Algorithm that controls the level of detail required for the algorithm to even recognize potential segments. The default value should work on most dental arches, but if you consistently are getting inaccurate results (possibly due to scanner type or software), this parameter would be the first place to start tweaking.
- Large Segment Threshold – This parameter controls how large a segment can be to automatically be excluded as a potentially correct segmentation result. For example, when the segmentation tool comes across a proposed segment that is larger than the average possible tooth, it automatically excludes that segment as a possible correct solution and adds it to the “other” group. The default value should work on most cases that involve human dental arches, however, if you want to experiment with segmentation outside of dental arches I have included this parameter to help with those cases.
- Virtual Prep Tool – A button presented at the end of the tool that allows you to immediately transition to the “Virtual Prep” tool in D3Lab x64.
- Virtual Extraction – A button presented at the end of the tool that allows you to immediately transition to the “Virtual Extraction” tool in D3Lab x64.
- Provisional Crown – A button presented at the end of the tool that allows you to immediately transition to the “Provisional Crown” tool in D3Lab x64.
- Segment Another Model – A button presented at the end of the tool that allows you to immediately restart the “Dental Segmentation” tool in D3Lab x64.
Dental Segmentation – Start Tool – [Step 1]
Starting any of the tools in D3Lab x64 begins with clicking on the tool name in the top “Menu” panel:
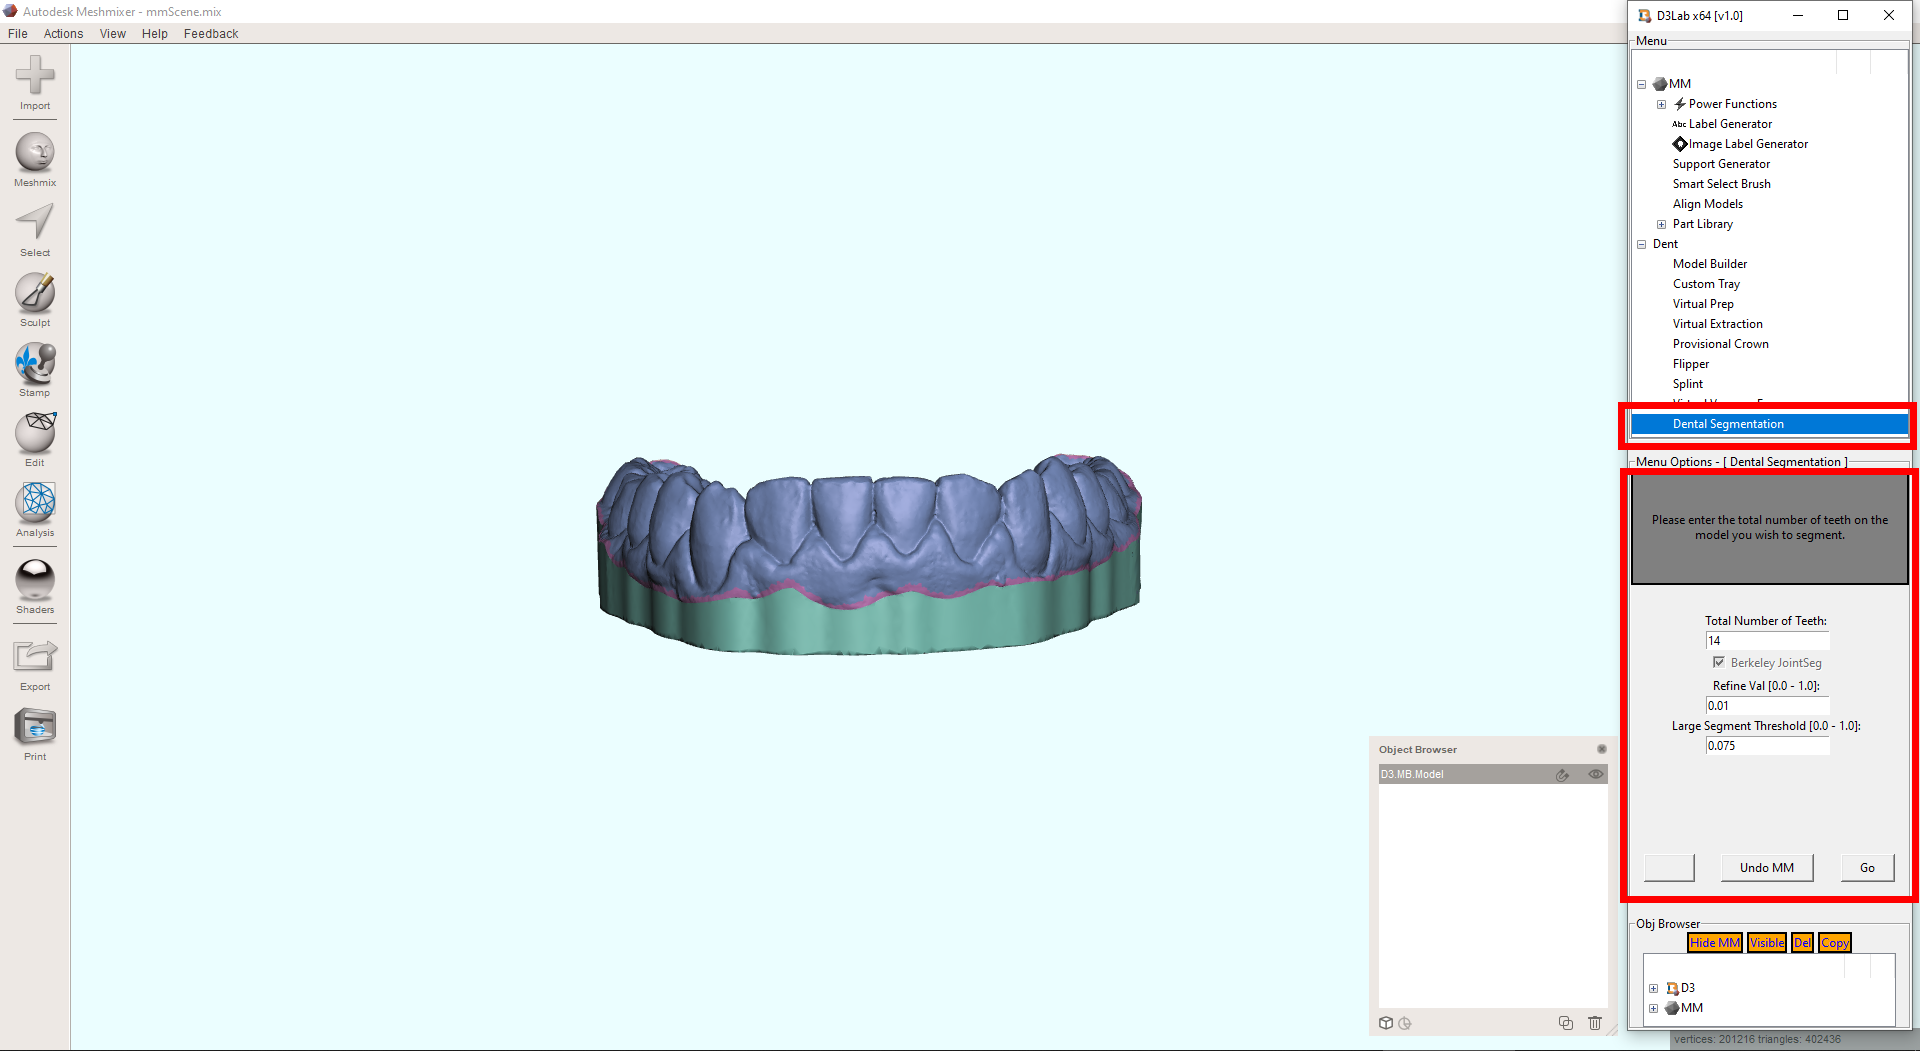
Dental Segmentation – Set Segmentation Parameters – [Step 2]
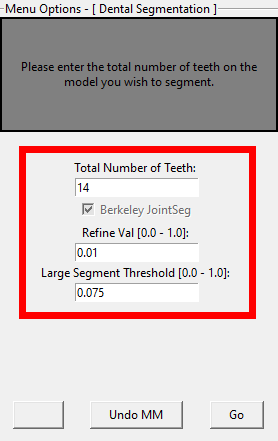
The Dental Segmentation default parameters have been fine tuned to get the best results for scanned dental arches (IO or desktop scan of cast). This means that it is usually unnecessary (and recommended) to not change any of the parameters except for the “Total Number of Teeth”. If you are interested in using the Dental Segmentation tool outside the scope of dental arches, refer to the Advanced Usage section below. Any type of solid/manifold dental arch will work with this tool, however, to achieve the best results possible:
- Use a based model
- Use a non-hollow base (if hollow models are truly unavoidable in your workflow, increasing the thickness of the walls might partially improve results)
- Remove any labels, text and embossments on the model
Start by changing the “Total Number of Teeth” parameter if necessary, and then press ‘Go’ to initiate the segmentation process:
Dental Segmentation – Segmentation – [Step 3]
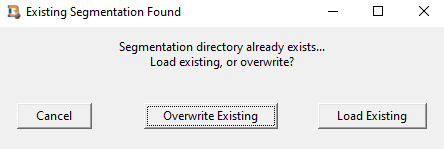
After pressing ‘Go’, D3Lab x64 first checks to see if the model has been previously segmented (based off the model name in Meshmixer). If D3Lab x64 detects the model you have chosen has already been ran through the segmentation tool, it will display a prompt asking if you would like to overwrite the existing segmentation data, or load the existing segmentation. It is important to note that if you choose to load the existing segmentation, the parameters given in Step 2 will be ignored, as the segmentation algorithm is not even executed:
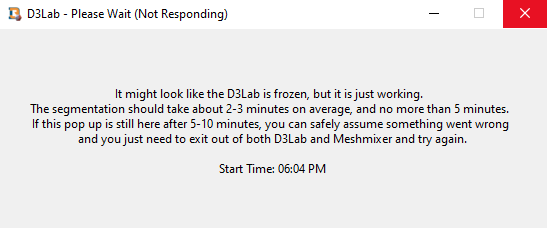
If the model has never been segmented, the segmentation tool begins and after a short time a prompt will appear letting you know that the segmentation algorithm has started to run in the background. At this point, the segmentation process proceeds until it is finished, at which point the prompt will automatically close.
From here, a few more finishing steps are completed within Meshmixer and three models are generated:
- Teeth (D3.DENTSEG.Teeth) – The “Teeth” object is the result of the segmentation separated from the initial model.
- Gingiva (D3.DENTSEG.Gingiva) – The “Gingiva” object is everything other then the segmentation result separated from the initial model, which usually is the gingival tissue and base of the model.
- Combined (D3.DENTSEG.Combined) – The “Combined” object is both of the above combined in one model. It is the same as the original model.
*Note*: Each of the above models generated by the segmentation tool are slightly reduced in resolution as a result of the segmentation process. It is possible to manually remesh the result to a higher resolution if needed.
The segments are represented by different colors that have been randomly assigned, which are known as face groups in Meshmixer. These face groups make it easy to select and interact with individual components of a 3D model.
Dental Segmentation – Options After Segmentation – [Step 4]
Once the tool is completed and the three segmentation models have been generated, you are given some additional options in the form of several buttons that are commonly used after segmenting a dental model. These tools rely on selecting teeth in their entirety, so segmenting the model before running these tools can greatly improve the efficiency and accuracy of these tools. Running the segmentation before using the “Flipper” tool is also very helpful.
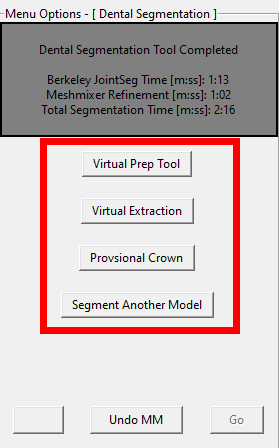
- Virtual Prep Tool – Immediately transition to the “Virtual Prep” tool in D3Lab x64.
- Virtual Extraction – Immediately transition to the “Virtual Extraction” tool in D3Lab x64.
- Provisional Crown – Immediately transition to the “Provisional Crown” tool in D3Lab x64.
- Segment Another Model – Immediately restart the “Dental Segmentation” tool in D3Lab x64.
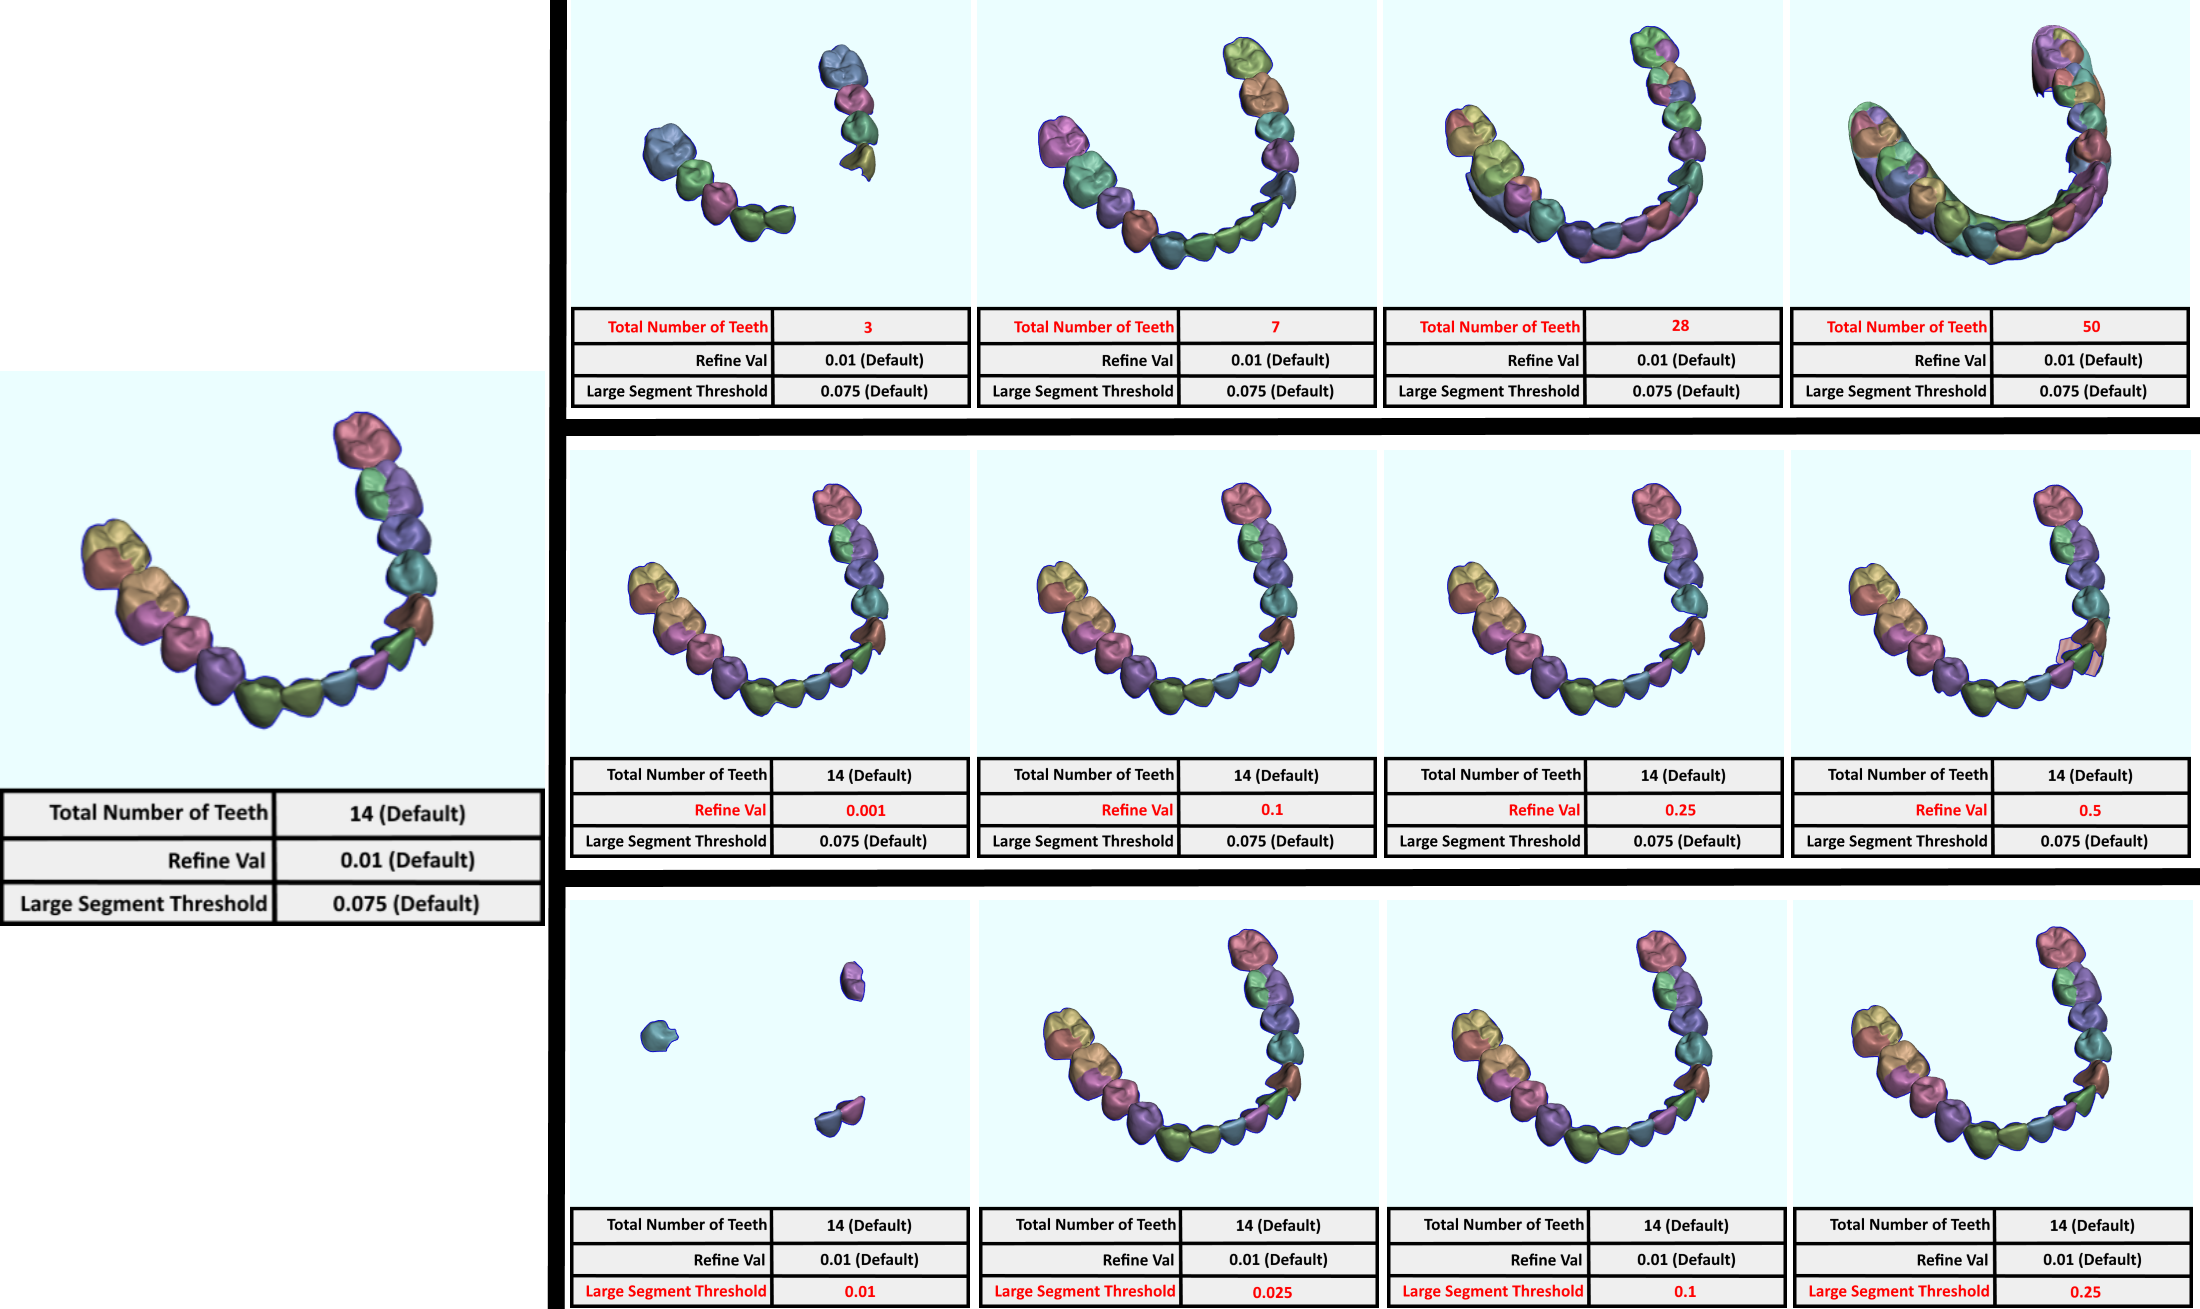
Dental Segmentation – [Advanced]
The “Dental Segmentation” tool employs a universal 3D segmentation algorithm, it just happens to be fined tuned to be used with dental arches. While slightly adjusting these tool parameters might help in getting improved segmentation results on certain scanned dental arches, it is also possible to use this tool outside the scope of dental arches to possibly segment other anatomical or engineered 3D models as long as they follow the solid/manifold requirement. Here are the results of adjusting each parameter one at a time on the same model, with a comparison of the default values result:
Here are some videos that demonstrate how the tool works:
Video 1 – How to use the Dental Segmentation tool in D3Lab x64
At the completion of this lesson, you should be able to:
- Use the “Dental Arch Segmentation” tool with the default parameter values.
- Have a basic understanding of what the different parameters are and the effect they have on the end segmentation result
- Understand why segmenting models before running other tools can be helpful