In this lesson, you will learn:
- How to use the Virtual Prep tool in D3Lab x64
- When and why to use the Virtual Prep tool
Preface
Sections
- Starting the Virtual Prep Tool
- Selecting Target Tooth Surfaces
- Setting Prep Parameters
- Options After Virtual Prep
- Advanced Usage
Demonstration Videos
Tool Parameters:
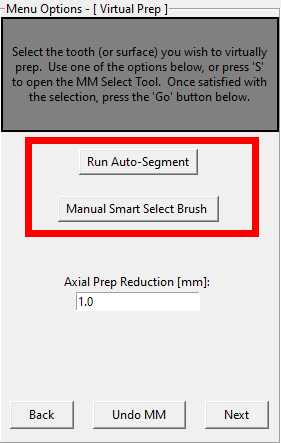
- Run Auto-Segment – A button that will immediately transition you to the “Dental Segmentation” tool, so you can generate a segmented model that will be easier to use with the “Virtual Prep” tool.
(Please note that pressing this button will quit your current “Virtual Prep” tool session, and start the “Dental Segmentation” tool workflow.) - Manual Smart Select Brush – A button that will load the “Smart Select Brush” for you to use to assist with the tooth surface selection. Alternatively, you could left click on “Smart Select Brush” in the top main menu portion of D3Lab x64. Loading this brush either way will not interrupt the “Virtual Prep” tool.
- Axial Prep Reduction – The amount of axial reduction you want the virtual prep to have (in millimeters).
- Prep Another Tooth – A button that will restart the “Virtual Prep” tool from the beginning so you can virtually prep another tooth right away if desired.
Virtual Prep – Starting the Virtual Prep Tool – [Step 1]
Starting any of the tools in D3Lab x64 begins with clicking on the tool name in the top “Menu” panel:
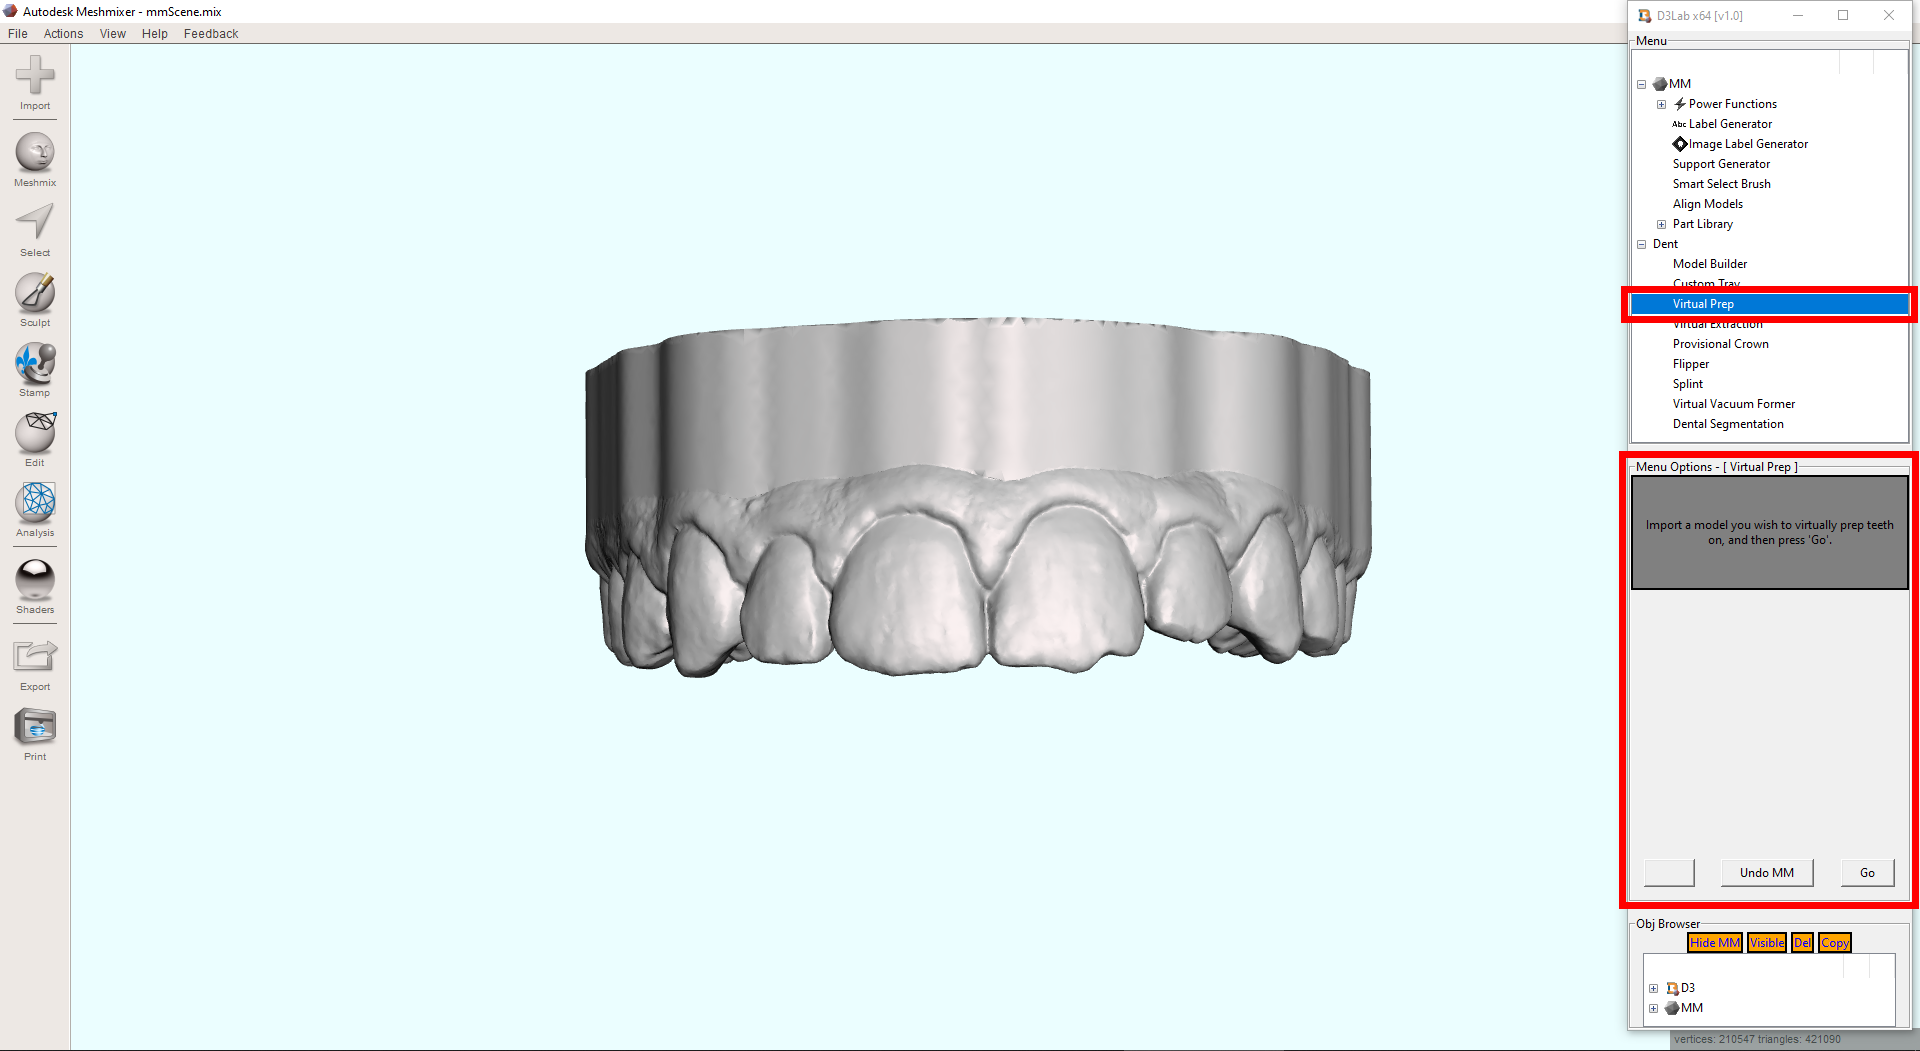
After you have started the “Virtual Prep” tool by following the above direction, press the “Go” button (in the middle “Menu Options” section of D3Lab x64) once your model is loaded into Meshmixer to proceed to the next step.
Virtual Prep – Selecting Target Tooth Surfaces – [Step 2]
You are now asked to select the entire tooth (or partial tooth surface), that you would like to virtually prep. Therefore, if the entire tooth is selected the result would be a virtual full coverage crown preparation, while just a selection that included only the labial/facial/buccal surface would result in a virtual veneer preparation, and so on:
It is important to note, the draw/path of insertion/undercuts are not taken into consideration, and this tool simply reduces the selected tooth surface by the given axial radius only.
D3Lab x64 provides three approaches to help select the desired tooth surface:
1. The Basic Meshmixer Select Brush – By default, this is automatically loaded for this step, and works best when absolute precision is required for your selections. Simply left click and drag on the desired tooth surfaces:
2. Run Auto-Segment Button – Pressing this will immediately transition you to the “Dental Segmentation” tool, so you can generate a segmented model that will be easier to use with the “Virtual Prep” tool. This will require restarting the “Virtual Prep” tool after the segmentation is completed. Double click a pre-segmented tooth to automatically select the entire thing:
3. Manual Smart Select Brush – Pressing this will load the “Smart Select Brush” to assist with the tooth surface selection. Alternatively, you could left click on “Smart Select Brush” in the top main menu portion of D3Lab x64. Loading this brush either way will not interrupt the “Virtual Prep” tool. Left click and drag to select your desired surfaces:
Virtual Prep – Setting Prep Parameters – [Step 3]
The only parameter that can be changed for this tool is the “Axial Prep Reduction”. The default value is 1.0 (in millimeters) and represents the amount of axial reduction you want the virtual prep to have:
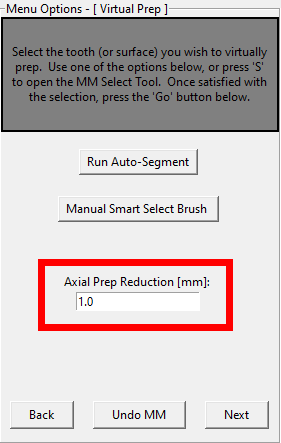
It is important to note, the draw/path of insertion/undercuts are not taken into consideration, and this tool simply reduces the selected tooth surface by the given axial radius only.
Once you are satisfied with your selection and parameter setting, press the “Next” button to complete the virtual preparation:
Virtual Prep – Options After Virtual Prep – [Step 4]
At this time, the only option available after the tool is completed is a button labeled “Prep Another Tooth”:
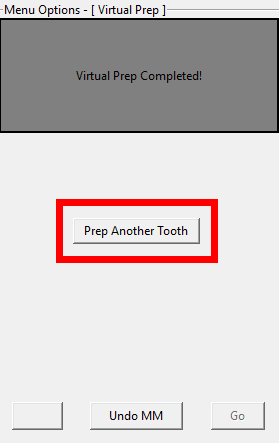
Pressing this button will restart the “Virtual Prep” tool from the beginning so you can virtually prep another tooth right away if desired. Alternatively, you could left click on “Virtual Prep” in the top main menu portion of D3Lab x64.
Virtual Prep – [Advanced]
It is not advised or recommended to use this tool for any workflow that involves fabrication of surgical bone reduction guides. It has not been tested for these purposes, nor was it intended for these purposes. However, creating educational models, models to aid in visual analysis or any other type of non-clinical or indirect planning scenario would be interesting to explore.
It is possible to virtually prep multiple teeth at one time, but results may vary.
Here are some videos that demonstrate how the tool works:
Video 1 – Provisional Crowns, Virtual Extractions and Virtual Crown Preps
At the completion of this lesson, you should be able to:
- Understand and know how to use the different methods of selecting teeth surfaces
- Broad understanding of which selection method might be best suited for different virtual operative procedures
- Virtually prep a full coverage crown, veneer and onlay