In this lesson, you will learn:
- How to use the Provisional Crown tool in D3Lab x64
- When and why to use the Provisional Crown tool
Preface
Sections
- Starting the Provisional Crown Tool
- Selecting the Target Tooth
- Setting the Parameters
- Options After Provisional Crown Tool
- Advanced Usage
Demonstration Videos
Tool Parameters:
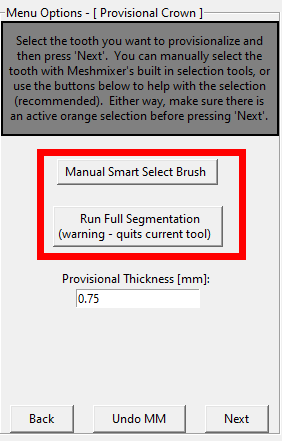
- Manual Smart Select Brush – A button that will load the “Smart Select Brush” for you to use to assist with the tooth selection. Alternatively, you could left click on “Smart Select Brush” in the top main menu portion of D3Lab x64. Loading this brush either way will not interrupt the “Provisional Crown” tool.
- Run Full Segmentation – A button that will immediately transition you to the “Dental Segmentation” tool, so you can generate a segmented model that will be easier to use with the “Provisional Crown” tool.
(Please note that pressing this button will quit your current “Provisional Crown” tool session, and start the “Dental Segmentation” tool workflow.) - Provisional Thickness – The value that controls how thick the walls of the provisional crown will be.
- Export – A button that is presented at the end of the “Provisional Crown” tool, that will export and save the provisional that was generated. The exported file can then be either directly 3D printed or imported into another software for further planning or processing.
- Make Solid – A button that is presented at the end of the “Provisional Crown” tool, that will run Meshmixer’s internal “Make Solid” tool. This button is included for convenience only, and is mainly meant for advanced users.
Provisional Crown – Starting the Provisional Crown Tool – [Step 1]
Starting any of the tools in D3Lab x64 begins with clicking on the tool name in the top “Menu” panel:
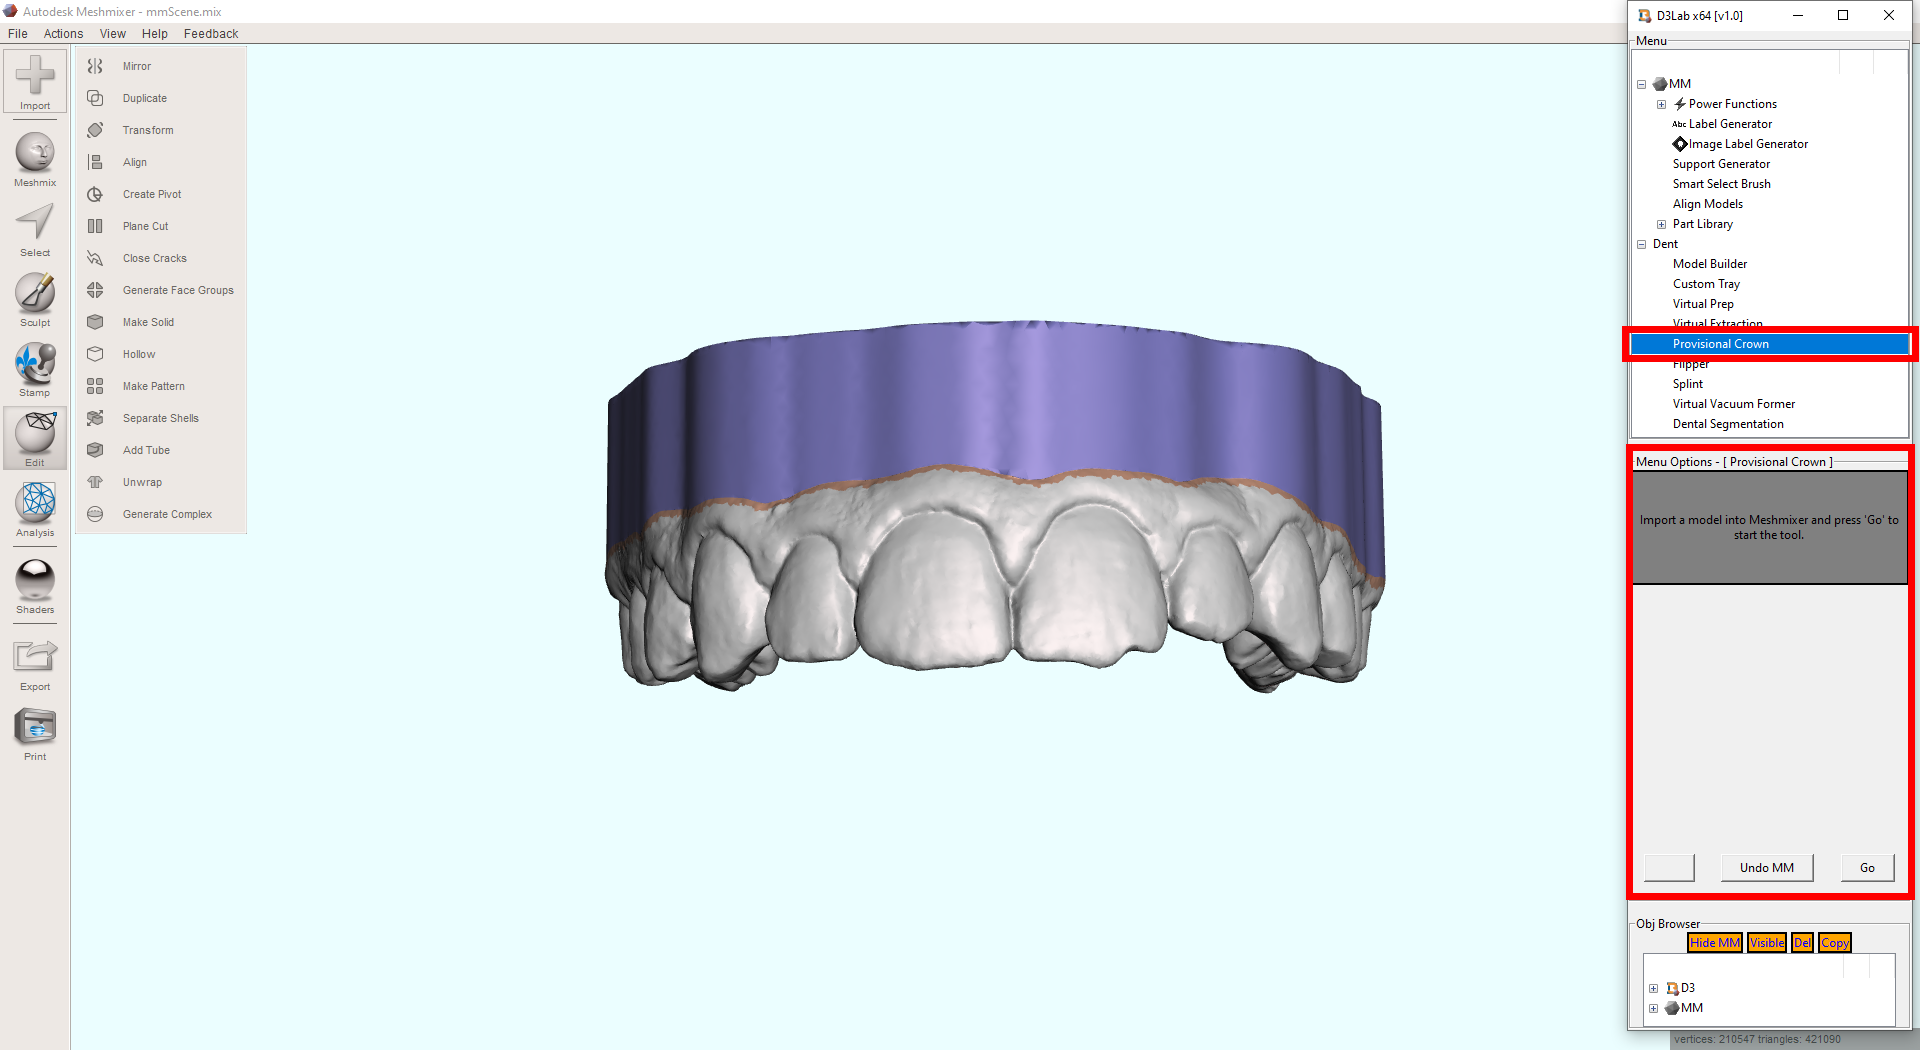
After you have started the “Provisional Crown” tool by following the above direction, press the “Go” button (in the middle “Menu Options” section of D3Lab x64) once your model is loaded into Meshmixer to proceed to the next step.
Provisional Crown – Selecting the Target Tooth – [Step 2]
D3Lab x64 provides three approaches to help select the desired tooth surface:
- The Basic Meshmixer Select Brush – By default, this is automatically loaded for this step, and works best when absolute precision is required for your selections. Simply left click and drag on the desired tooth surfaces.
- Run Auto-Segment Button – Pressing this will immediately transition you to the “Dental Segmentation” tool, so you can generate a segmented model that will be easier to use with the “Provisional Crown” tool. This will require restarting the “Provisional Crown” tool after the segmentation is completed. Double click a pre-segmented tooth to automatically select the entire thing.
- Manual Smart Select Brush – Pressing this will load the “Smart Select Brush” to assist with the tooth surface selection. Alternatively, you could left click on “Smart Select Brush” in the top main menu portion of D3Lab x64. Loading this brush either way will not interrupt the “Provisional Crown” tool. Left click and drag to select your desired surfaces.
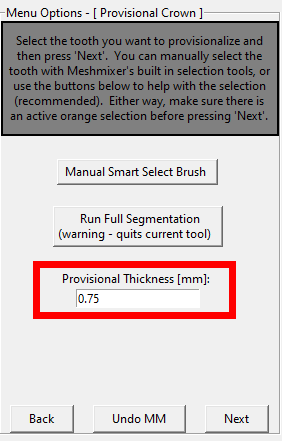
Provisional Crown – Setting the Parameters – [Step 3]
The only parameter that can be changed for this tool is the “Provisional Thickness”. The default value is 0.75 (in millimeters) and represents the desired thickness of the walls of the provisional that is generated:
Once you are satisfied with your selection and parameter setting, press the “Next” button to generate the provisional crown:
It is important to note, the draw/path of insertion/undercuts are not taken into consideration, and this tool simply creates a 3D shell of the selected tooth surface with the given user defined thickness only.
Provisional Crown – Options After Provisional Crown Tool – [Step 4]
Once the tool is completed and the provisional crown has been generated, you are given some additional options in the form of buttons that are commonly used after fabricating a provisional crown:
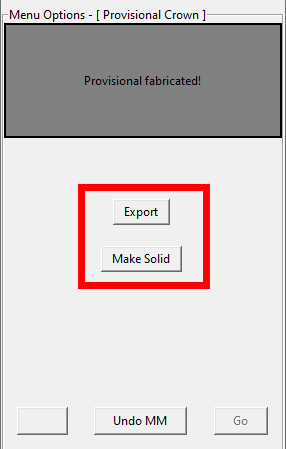
- Export – Export and save the provisional that was generated. The exported file can then be either directly 3D printed or imported into another software for further planning or processing.
- Make Solid – Run Meshmixer’s internal “Make Solid” tool. This button is included for convenience only, and is mainly meant for advanced users
Provisional Crown – [Advanced]
Similar to some of the other tools, it is possible to generate provisional crowns on multiple selected teeth at once. If the selected teeth are in sequence, it is possible to fabricate a provisional “bridge”, however, the pontics will be hollowed similar to the abutments, so further processing would be needed chairside or virtually if that were your intention. Additionally, a full arch of selected teeth would produce a good start for 3D printed denture teeth:
Here are some videos that demonstrate how the tool works:
Video 1 – Provisional Crowns, Virtual Extractions and Virtual Crown Preps
At the completion of this lesson, you should be able to:
- Know the various ways to select the target tooth before committing to virtual fabrication
- Virtually fabricate a provisional crown from an input scan, and export it for 3D printing